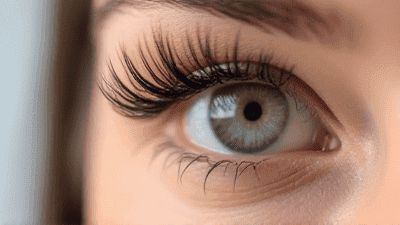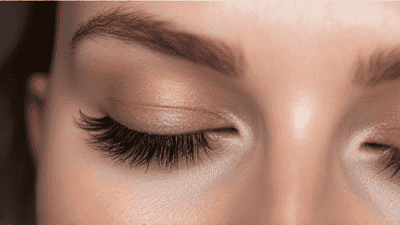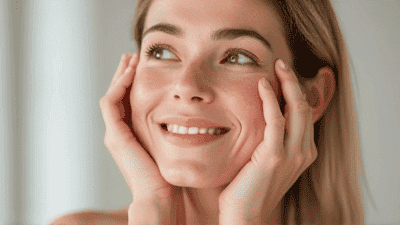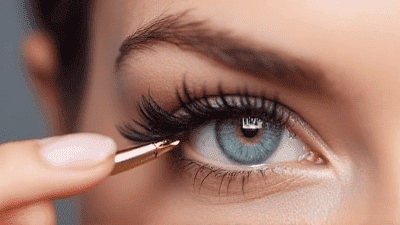
Long, curled eyelashes are often considered a hallmark of beauty, framing the eyes and adding an enchanting touch to any makeup look. While mascara can enhance and define lashes, many beauty enthusiasts turn to eyelash curlers to achieve that coveted lifted look. However, despite their popularity, many people are hesitant to use eyelash curlers due to misconceptions and fears of causing damage. In this comprehensive guide, we will demystify eyelash curlers, explore how to use them safely, discuss different types available, and share tips and techniques for achieving beautifully curled lashes.
An eyelash curler is a beauty tool designed to curl and lift your eyelashes, making them appear longer and more defined. It typically consists of two main parts: a curved clamp and a lever. When used properly, an eyelash curler can create a beautiful, sweeping curl that enhances your overall eye makeup.
Using an eyelash curler offers several benefits:
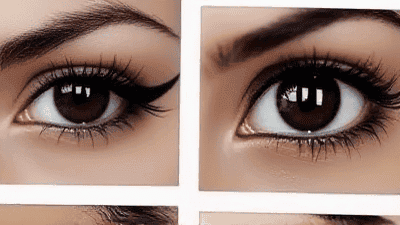
Creates Lift and Dimension: Curling your lashes adds instant lift and dimension to your eyes, giving them a more awake and youthful appearance.
Enhances the Effect of Mascara: When curled lashes are coated with mascara, the overall effect is amplified, making lashes look longer and fuller.
Achieves a Long-lasting Curl: Eyelash curlers set the shape of your lashes, which can help the curl last throughout the day, especially when combined with mascara.
Customizable Curl: Different curling techniques can create various effects, from natural-looking curls to dramatic lifts, depending on your desired look.
To effectively use an eyelash curler, it helps to understand its anatomy:
Curling Platform: The part that makes contact with your lashes. The curvature of this platform determines the shape of the curl.
Handles: The two pieces you squeeze together to operate the curler.
Rubber Pad: A soft rubber pad at the curling platform that presses against the lashes to create the curl. This pad is crucial for achieving a firm grip and preventing lash damage.

There are several types of eyelash curlers available, each designed to cater to specific needs and preferences:
The most common type of eyelash curler is the traditional style, which features a curved clamp and lever. These curlers are typically made of metal and come in various sizes. They are suitable for most eye shapes and lash lengths.
Heated eyelash curlers use gentle heat to curl the lashes, similar to curling irons for hair. The heat allows for a longer-lasting hold, and the design usually includes a curved barrel. Heated curlers are beneficial for stubborn lashes that resist curling.
Electric curlers are battery-operated devices that provide a consistent and heated curl. These tools often have a simple design, making them easy to use and promising a quick and effective curling experience.
Mini or travel-sized eyelash curlers are compact versions that are ideal for on-the-go touch-ups. While they may have a smaller gripping surface, they can still achieve satisfactory results and are convenient for makeup bags.
Some eyelash curlers adopt a silicone pad instead of a rubber pad. Silicone pads may be gentler on lashes and provide a softer curl without causing excessive bending or crimping.
Despite their effectiveness, eyelash curlers are often surrounded by myths and misconceptions that may deter users. Let’s debunk some common myths:
Many people fear that using an eyelash curler will lead to breakage or damage. In reality, when used correctly, curlers are safe and effective. Avoid vigorous pulling or using an eyelash curler on wet lashes, as water can weaken and damage them.
Curling after applying mascara is a common mistake. Doing so can cause lashes to clump, break, or stick to the curler. Always curl your lashes before applying mascara for the best results.
Eyelash curlers vary in design, size, and material. Choosing the right curler based on your eye shape and lash length can make a significant difference in achieving desired results. It may take trying a few different types to find the best fit for your needs.
While heated curlers can enhance the longevity of a curl, they are not mandatory. Many people achieve beautiful curls with traditional curlers. Experiment with both to see which one works best for your lashes.

Using an eyelash curler safely involves several steps:
Before you start, assemble the necessary tools:
If you desire a more dramatic curl, position the curler again slightly higher up the lashes (about halfway up) and repeat the process for an additional 10 seconds. This step adds extra lift to the curl.
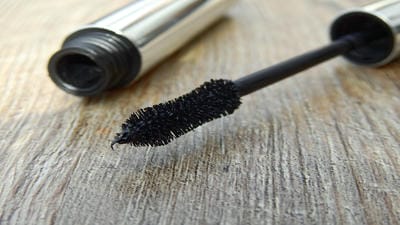
Once you have achieved the desired curl, apply your favorite mascara to enhance the lifted look. Start from the base of your lashes and wiggle the wand side-to-side as you swipe upward to avoid clumping.
After use, clean the rubber pad of your curler to remove any residual mascara. This ensures hygiene and prevents product buildup, which can cause your lashes to stick.
With the basics covered, consider these expert tips to maximize your eyelash curling experience:
Invest in a good-quality eyelash curler that suits your eye shape. A well-made curler will provide better results and is often more comfortable to use.
If using a traditional curler, you can gently warm the curling pad with a hairdryer for a few seconds. Ensure it is not too hot, then test the temperature on the back of your hand. A warm curler can create longer-lasting curls.
Take note of your lash health and avoid curling damaged lashes. If your lashes are particularly brittle or feel weak, allow them to recover before using a curler.
Trying various curling techniques can yield different results. You can experiment with holding the curler at different angles or curling in multiple sections to develop your preferred look.
Replacing your eyelash curler every six months to a year can help ensure the rubber pad remains in good condition, providing a stable grip and requiring less pressure during use.
A healthy diet and proper hydration can improve the overall strength and condition of your lashes. Consider incorporating foods rich in vitamins and antioxidants to promote lash health.

If you encounter issues while using an eyelash curler, consider these common problems and their solutions:
If you find that your lashes are not curling effectively, consider the following:
If your lashes look pinched or crimped after curling, this may be due to improper technique or a worn-out curler pad.
If you find that your curl doesn’t last throughout the day, consider these solutions:
If your lashes become clumpy after curling, it may stem from mascara application.
For those seeking professional-level results, consider incorporating these advanced techniques:
For a more dramatic look, try a multi-step approach to curling. Start with one base curl, release, and reposition the curler midway to add additional lift.
Once curled, use the mascara wand to separate lashes while fanning them out. This technique enhances volume and lightens the appearance of lashes.
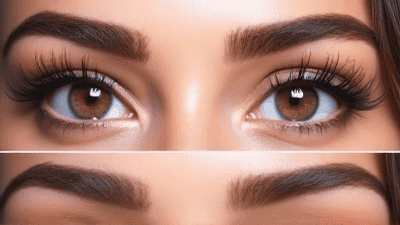
Pair your eyelash curling routine with brow lifting methods for a completely transformed appearance. Ensure arches are sculpted to compliment the lifted lashes.
After curling your lashes and applying mascara, take a moment to finish your look. Here are some final touches to consider:
A clear or tinted brow gel can complete your eye makeup. Groomed brows frame your face and accentuate your curled lashes.
Complete your eye makeup with eyeliner or eyeshadow that complements your look. The focus on beautifully curled lashes will boost the entire eye appearance.
Lock in your makeup look with a quality setting spray that helps maintain the curl and keeps your eye makeup fresh throughout the day.
Eyelash curlers can be a game changer in achieving beautifully lifted and curled lashes that enhance your eyes and your overall appearance. By understanding the different types of curlers available and learning the proper techniques for use, you can enjoy the many benefits of this fantastic beauty tool.
As you embark on your eyelash curling journey, remember to embrace a thoughtful approach that prioritizes lash health and safety. With practice, care, and a bit of experimentation, you’ll master the art of curling your eyelashes and achieve stunning, fluttery results with ease. Whether you're preparing for a special occasion or adding that extra touch to your daily routine, eyelash curlers can help elevate your beauty game to new heights. Enjoy your journey to perfectly curled lashes and let your eyes shine bright!